Enemies & Danger
Eight families of enemy come at your train. Three of them simply want to reach you; the other five each break a rule you were relying on.
Start with the one fact that never changes: your guns fire on two damage channels, and no single gun type handles everything. Brutes are armoured against physical damage and soft to energy; Grapplers are the exact inverse. See Guns, Cores & Elements for which guns fire which channel.
Every family has a colour you can read at a distance, and its subtypes differ in shape and in how they move. If something is on all fours, it is a Leaper. If it is dragging a rope, it is a Grappler.
The eight families
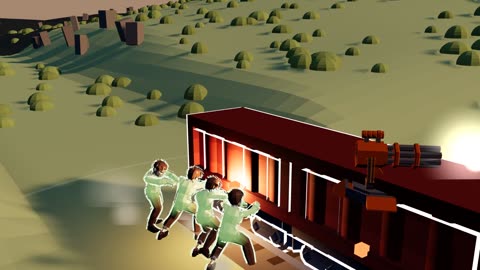
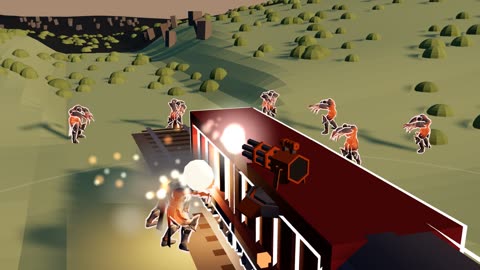
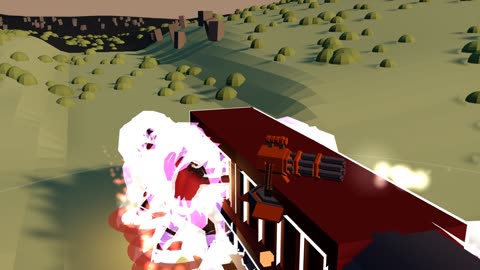
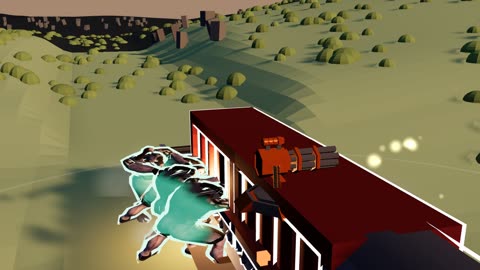
Walker — the crowd
Green. Bare to everything, and the reason you own a fast physical gun at all.
Ram Prow (2026-10-10): Throws a Walker aside at full distance, except the Ploughman: squat and heavy, it flies 60% as far.
| Subtype | What it does |
|---|---|
| Shambler | The crowd. Walks at the nearest carriage and chews. |
| Strider | Tall and thin. Walks past your engine to press the rear of the train, so the crowd spreads along the whole consist instead of piling up at the front where your ram and forward guns already are. The back has to defend itself. |
| Ploughman | Squat and dark. Most zombies walk around burning ground. This one doesn't — it comes straight through the fire, burning, and keeps coming. A wall of hazards will leak Ploughmen. |
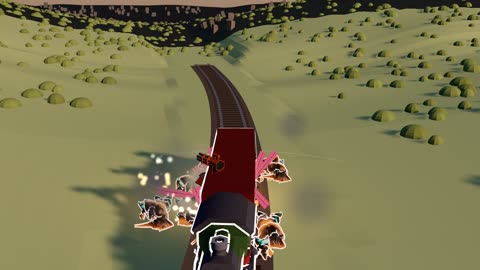
Zombies that grab on. Draggers latch onto the train with a long pink tongue and get towed behind it - flying and tumbling at speed. Vaulters throw a rope and climb up it. Anchors are the big ones: they latch on with a tongue AND rope themselves to the ground, braking the train until something gives - their rope (they stay hanging on and throw another) or their tongue (they're torn off and crash). Speed helps: a flying Dragger drags less than one bumping along the ground. Every Dragger on a rope also drains the carriage it hooked, a little HP each second, so Damage Reflection hits back at all of them.
Brute — the wall
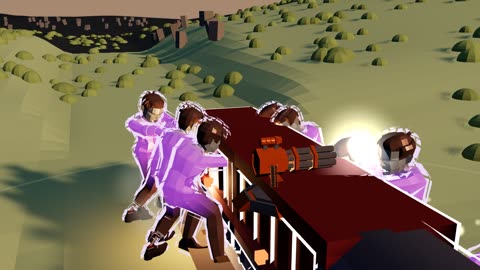
Purple. Slow, huge, heavily armoured against physical damage, and it does not panic. This is where a machine-gun-only build is meant to stall. All three are immune to Earth's stun and Ice's freeze, too — too much mass to knock over or lock solid. Ice's ordinary slow and Fire's burn still land; it is only the hard-control effects a Brute shrugs off.
Ram Prow (2026-10-10): Never throws a Brute: too much mass.
| Subtype | What it does |
|---|---|
| Bulwark | The wall itself. Bring energy. |
| Breaker | Swings instead of chewing — big, slow, discrete hits, and every one of them knocks your speed down hard. |
| Shieldbearer | Carries a plate. Shots that hit it from the front barely scratch it; its flanks and back are soft. Where you shoot it from matters more than what you shoot it with. |
Grappler — the anchor
Orange. Hooks your train with a line and refuses to let go. Armoured against energy, soft to physical — the exact inverse of the Brute.
Ram Prow (2026-10-10): Never throws a Grappler: hooking your train is its job.
| Subtype | What it does |
|---|---|
| Dragger | Hooks a carriage, gets yanked off its feet, and trails behind it on a taut rope, bunching up with any others that caught the same car. It rides where most of your guns can't reach — and it slows you and drains that carriage's HP the whole time. Its rope is only as long as the throw that placed it, so it cannot drag itself the length of the train to reach the others. |
| Vaulter | Hooks on, then climbs its own rope onto the train. It does not wait for you to be slowed down first. |
| Anchor | Hooks your train and drives a stake into the ground. For about a second the line goes tight and your train brakes hard — then it snaps. Kill it before the line pulls, and you keep your speed. |
Sprinter — the ram
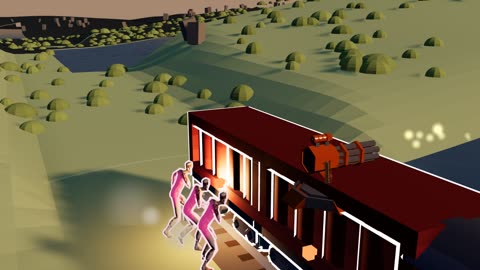
Magenta. Very fast, hits very hard, and dies to almost anything. It screams before it charges, which is your warning and your window. It also doesn't just chase — it cuts toward where your train is headed, not where it is right now, so a straight sprint away from one is a bad plan.
Ram Prow (2026-10-10): Throws a Charger or a Burster the full distance. It never throws a Bolter: a roadblock you could throw aside is not a roadblock.
| Subtype | What it does |
|---|---|
| Charger | Winds up, sprints, slams the front of the train, bounces off, and does it again. |
| Bolter | The tough one. It runs ahead of you and plants itself on the track, in your way. Your ram has to grind through it, and your speed bleeds the whole time it lives. Immune to Earth's stun — a roadblock that could be stunned out of the way would defeat the point of it. |
| Burster | Bloated. It detonates when it reaches you — one enormous hit — and dies doing it. Kill it at range or wear it. |
Spitter — the ranged threat
Coloured by its element. It stops short of your train and throws, so "shoot whatever is closest" stops being the right answer — and a wall of Brutes becomes a screen for something that is actually hurting you. Fragile: the hard part is reaching one. It winds up before its first throw, so there is a moment to kill it in.
Ram Prow (2026-10-10): Throws a Spitter almost the full distance (85%): light, but planted.
| Subtype | What it does |
|---|---|
| Fire Spitter | Sets your carriage burning. The damage keeps arriving after the Spitter is dead. |
| Ice Spitter | Chills you, stacking, and drags your speed down. While you are chilled, drop far enough — in speed or in health — and your engine seizes outright. No chill, no seize. A seize needs a fresh chill hit to start again. |
| Toxic Spitter | Fast and weak. Harmless for ten seconds, serious at forty. It punishes standing still. |
| Earth Spitter | A heavy stone that jolts the train — a lurch, a thud, and a dip in throttle you have to ride out. |
Leader — the aura
The rarest thing on the line, and it never turns up alone. It hangs back inside its own pack and buffs everything near it, marked by a ring on the ground in its own colour. Kill it and the whole crowd loses the buff at once — so for the first time the question is not what is closest, it is what is worth killing first.
You can see the aura, not just its owner. Everything inside it — the leader included — is wrapped in that leader's energy, and each kind looks different: Agro throws sharp red streaks up the body, Defence wraps it in a slow blue shroud with rings of light climbing it, and Morale sends violet wisps spiralling round it. A pack under two or three leaders wears every layer at once, so what a horde is carrying reads at a glance. A boss wears all three, thicker than any pack. The moment a leader dies, its layer goes out.
Leaders stack. Deeper into the ladder you will meet packs carrying several at once.
Ram Prow (2026-10-10): Never throws a Leader: the pack reads off it.
| Subtype | What its pack gets |
|---|---|
| Agro Leader | Moves faster and hits harder. It arrives sooner and in worse shape for you. |
| Defense Leader | Takes noticeably less damage. |
| Moral Leader | Shrugs off your elements — shorter afflictions, fewer procs — and will not panic. The answer to "just bring Fire". |
Only the Moral Leader is immune to panic. Set fire to the other two and they will run, dragging their aura out of their own pack — which is exactly what you want.
Husk — the splitter
Pale olive, and unmistakably fat. What it leaves behind is worse than what it does.
Ram Prow (2026-10-10): Throws a Huskling the full distance, a Brooder half, a Husk or a Bloater a little under half (45%). It never throws a brood egg.
| Subtype | What it does |
|---|---|
| Husk | Dies into six small, fast husklings. If you kill it while it is clinging to your train, all six arrive already aboard. |
| Huskling | Small, quick, and hits harder than it looks. It cannot split again. |
| Bloater | Bursts into a cloud that lingers. Drive through it and your screen slimes over while it eats a share of your health. Worse: every zombie that walks through is healed and buffed. |
| Brooder | The opposite of a Husk — it doesn't split when it dies, it births a huskling every few seconds while it lives. A Husk punishes killing it. A Brooder punishes ignoring it. |
| Brood egg | Only in the Brood-Mother's valley. A sac with a creature inside. It does not move or bite - it hatches. |
Leaper — the mobility threat
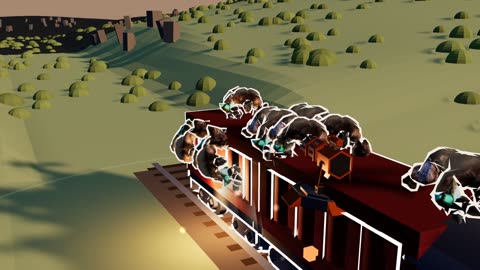
Near-black, and the only thing on the ground running on all fours. It jumps — a real arc, and it does not care how fast you are going. Speed is normally your defence against being boarded; against a Leaper it isn't. It crouches before it jumps, and you can shoot it out of the air.
Ram Prow (2026-10-10): Throws a Leaper the full distance.
| Subtype | What it does |
|---|---|
| Pouncer | Leaps onto the nearest carriage. Closes the gap toward where you're headed before it jumps, not just where you are. |
| Stalker | Shadows you from outside your gun range and is hard to hit at distance. It waits — and commits when you are nearly dead, mid-repair, or already swarmed. When it commits, it cuts the corner toward where you're headed rather than running you down in a straight line. |
| Flinger | Doesn't attack you much at all. It headbutts other zombies onto your train, like a break shot. It shadows at a distance while its throw is on cooldown, then runs in close, headbutts a body off the scrum at your hull, and backs straight out again — those few seconds inside your gun range are your window to kill it. Its victim is knocked into a high arc and comes down on the hull, a target the whole way, exactly like a Pouncer mid-leap. Kill the Flinger to stop the supply, not to stop the bite. |
Where and when
Danger builds as you travel further into a line, and again as you climb the Track Ladder — see The Track Ladder. Which enemies you meet also depends on where you are: Fire Spitters belong to volcanic country, Ice Spitters to the tundra, Husks to swamps.
Bosses
Every tenth rung stages a boss — guaranteed, not rolled, and surviving one for the first time is worth a reward. Every boss resists crits: a crit still hits a boss harder, but much less hard than it hits a normal enemy. Thorns hurt a boss less too: it loses a small share of its health each time it touches the train, so thorns wear a boss down slowly instead of killing it at once. There are nine of them and they rotate through three kinds:
- The chase (boss 1). It runs you down from behind and kicks the train — each kick takes 12% of your train's maximum health plus a flat part (about 2,900 at rung 10, and it grows with the rung; the sum goes through your armour as one hit, so armour softens it) and throws you forward, then it chases you down again. A fully upgraded train with the throttle in the red can outrun it after three kicks; anything slower gets caught more often, up to six kicks for a train that is stopped. The boss waits longer between kicks on a slow train, so even a slow train has a set number of kicks it can take, never one kick per second. It is really hard to kill rather than immune: a train just reaching it barely scratches it, but a strong damage build can bring it down, which ends the chase. If it catches you stopped at a blockage, its kick smashes you through — clearing the blockage, and hurting more. Nothing else spawns while the Harrower (or the Courser or Reacher) chases you, and the enemies already on the field leave when it appears, so your guns have no nearer target.
- Walls (bosses 2, 5, 8) stop you, and you must kill them or outlast them. Each one has its own fight, below.
- The Windlass (boss 2, rung 20) waits beside the track. When you pass it, it screeches and hooks your train with its tongue. You cannot cut the tongue.
- It drags behind you like ten Draggers, then plants a stake and stops the train dead. Tenacity makes each stop shorter.
- When the stake breaks, it slams into the train and throws you a short way ahead.
- While it holds on, all your healing is halved, and Bursters stream in from behind.
- Nothing else spawns on this level while it fights - only its Bursters.
- You can see each stake: it goes into the ground beside the track, with a rope to the boss. When the stake breaks, it tears out of the ground.
- At 80% of the track it lets go. Keep your speed up: if you slow down, it chases you, hooks on again and goes berserk (5x damage). Killing it then pays nothing extra.
- Bring Tenacity, area damage for the Bursters, and damage on both channels.
- The Brood-Mother (boss 3, rung 30) waits at a mountain. Halfway along the track, the line runs up a valley to a tunnel. Eggs sit on the slopes, more of them the closer you get.
- A rockfall blocks the line a little before the tunnel mouth, so you can see the arch. Your train stops. The repair takes 105 seconds, and Efficiency makes it faster (down to about 66 seconds). Ramming does not clear it.
- She sits on top of the arch, close to the hole, where you can see her. She screeches from up there, out of reach. You cannot kill her, and your turrets cannot target her. She does not hatch creatures herself - her eggs are the danger.
- Every 10 seconds, every egg on the map hatches - mostly Husks, some Bloaters and Brooders. Hatchlings from far eggs walk in to the train. Every 2 seconds she throws 3 eggs near your train, both sides, 10 to 22 units off the track. About half land beside the cars and half land up to 30 units in front of the engine, where your camera looks. Your guns can reach them.
- Eggs are tough. Only a build that hits very hard should shoot them.
- Eggs count toward the enemy cap. If the map is full, a thrown egg is lost. (The cap grows with the ladder: 100 live enemies on rung 1, about 5 more each rung, 600 on the last rung. Every device fights the same cap. Phones and small screens draw only the nearest 200; bosses are always drawn.)
- Normal spawns stop for the whole fight. Journey-event hordes still come.
- Survive the repair and drive into the tunnel. She stays behind.
- Bring area damage and crowd control.
- The Reacher (boss 4, rung 40) is a switchback descent. The track climbs to a mountain pass, then winds down two long stacks of hairpins to the plain. Each pass of the track runs close beside the last one.
- At the top of the descent the Reacher screeches and appears beside the track. It runs to your rear car and leaps onto it. Normal spawns stop while it lives.
- When it lands, your train drops to half speed, then wins it back over 6 seconds while it still rides. Each new landing halves it again. Tenacity does not help. It drains the rear car: 1 stack when it lands and 1 more stack each second. Each stack makes the drain 4% bigger than the last, so it starts small and ramps up smoothly. Armour reduces the drain every second, so healing matters. Your guns can shoot it while it rides.
- Take a hairpin fast enough and it falls off to the outside of the curve. The drain stops at once and all stacks go. It takes fall damage: the faster the train, the more damage. Ram Damage does not change this. On a fully upgraded train you must push the lever into the red (about 120%) to throw it.
- It gets up after 1.5 seconds, runs straight across the switchback and leaps on again on the next pass. The track turns so much that a fast train does not escape it.
- Win: reach 90% of the leg (it gives up), or kill it (150x the hp of a normal enemy on the rung; each fast throw takes about a tenth).
- Lose: the drain takes all your hp.
- The build check is sustain. Lifesteal and health regen heal you between throws. A train with no sustain does not last. A killing hit still kills: no heal lifts you back from 0 hp. Lifesteal and DoT lifesteal share a heal budget (see The Depot).
- Every number is a starting value. They wait for a playtest. They are not final.
- The Bulkhead (boss 5, rung 50) bursts onto the track ahead of you and runs. It never attacks the train. You must catch it and kill it before it reaches the station. If it gets there, you lose the run.
- It runs at almost the speed of a fully upgraded train. Speed upgrades decide if you can catch it.
- Shoot it and it runs faster (up to 2x). Stop shooting and it slows down again and heals.
- When it has not been hit for 14 seconds, it stops and smashes the track. You must stop at the break and repair it. A repair costs nothing, takes 6 seconds, and Efficiency makes it faster.
- Watch the Track stability meter beside Quit. It is the run's own line, so it starts where your run stands (10 unless a route event is still open). It shows the breaks on the track right now: each open break costs 2, and a finished repair gives the 2 back. At 0 the line collapses and you lose the run.
- Normal spawns keep coming during the fight.
- It is easy to kill once you reach it: it has no armour. Bring speed to catch it and Efficiency to repair fast.
- Every number is a starting value. They wait for a playtest. They are not final.
- The Standard (boss 6, rung 60) holds a bridge. The line runs a long, high ridge with a drop on one side, then crosses a gorge on a bridge.
- The far end of the bridge is broken. Your train stops on the bridge. The repair takes 105 seconds, and Efficiency makes it faster (down to about 66 seconds). Ramming does not clear it.
- The Standard screeches from beyond the bridge, out of reach. You cannot kill it. Normal spawns stop while the fight runs.
- It calls Agro Leaders, 2 every second. Each Leader calls Spitters.
- They mass in one big pile on the far side of the bridge, and they stay there. The Spitters spit at you from the pile.
- A Spitter you kill comes back 3 seconds later. A Leader you kill stays dead.
- Every Leader near a Spitter makes its spit hit harder. The longer the fight, the more Leaders, the harder the spit.
- Survive the repair and drive on. The Standard stays behind.
- Efficiency is the biggest help. Health, defence and regen soak the spit. Damage and splash kill Leaders as they come and keep Spitters down.
- Every number is a starting value. They wait for a playtest. They are not final.
- The Courser (boss 7, rung 70) is a volcano escape. The track runs between two volcanoes, then goes down one long, straight slope to the end of the section, near the station. The leg starts high and runs downhill all the way, at the steepest slope the rail allows (2.3%). It stays dry: there is no bridge.
- When the front of your train passes between the volcanoes, both erupt. The Courser screeches and appears. Normal spawns stop while it lives, and start again after you kill it. This leg has fewer normal mobs than usual.
- A lava front starts 150 units behind your train. It moves at 60% of your top speed. It never speeds up. It is a sheet of magma across the valley, thin at its edge and deeper behind (up to 4 units deep, 60 units in). It burns each car it reaches. The deeper it is, the more it burns. Armour does not help. If your whole engine goes under, your train dies at once, even a tank. It also kills the mobs it reaches. The Courser never steps into it.
- The lava runs to the station. It keeps coming after you kill the Courser. Keep moving.
- The Courser runs wide, turns to face you for 1.5 seconds, then charges. A hit kicks your train 120 units back up the slope, stops it, and deals fixed damage. Tenacity makes the kick shorter.
- After the kick, the Courser is thrown off the track and staggers for 3 seconds. Shoot it then.
- Fit the Ram Prow (at least 1 level of Ram Damage) and keep 60% of your top speed or more (lowered from 80% on 2026-10-03). Then you win the collision: no kick, the Courser takes your ram damage, and you lose 30% of your speed for a moment.
- Full Steam does not save you from the kick: the train still stops, and the 30% speed loss still applies.
- You can kill it. It has the same hp scale as the chase boss. At the station it gives up.
- The kick damage, the lava burn and the magma-wave numbers are starting values. They wait for a playtest. They are not final.
- Bring Tenacity, the Ram Prow, and a high top speed.
- The Cairn (boss 8, rung 80) is an artillery gauntlet. A long track runs under high ridges.
- From 30% of the track to 85%, it shells your train from the ridge. You cannot see it most of the time. You see its shells.
- Each shell shows a red circle on the ground where it will land. The circle grows. When it is full size, the shell lands. The circle is the size of the blast: about 2 1/2 cars wide.
- It aims at where the front of your train will be: at your current speed, at full throttle, or stopped. Change your speed to get out of the circle.
- Every car inside the circle takes damage. Armour helps. A hit also slows the train for a moment.
- Later in the track it fires two or three shells at once, each aimed a different way.
- Near the middle, the track runs through a canyon right under it. Only there can your guns reach it. Only long guns reach: mortars, and rockets with range upgrades. You can kill it there. Slow down to shoot longer, but the shells keep coming.
- Reach 85% of the track and it gives up. Normal spawns run at half rate during the fight.
- Bring throttle control, armour and health, and gun range. Every number is a starting value. They wait for a playtest. They are not final.
- The Tide (boss 9, rung 90) waits in a volcanic cavern deep under the ground.
- Halfway along the track the tunnel has caved in, in the middle of a big open hall. The train must stop and dig: 147 seconds, and Efficiency makes it faster (down to about 92 seconds). No stat lets you skip it.
- Shamblers pour out of five tunnel mouths in the hall walls, and they never stop. Normal spawns stop while the fight runs.
- Each Shambler is enraged (it bites 5 times harder) and carries every leader's buff.
- While the hall is packed full, they all hit ten times harder again. Keep killing to keep the numbers down.
- The Tide watches from the far side of the hall. You cannot reach it or kill it.
- Survive the dig and drive on. A short way past the collapse, the Shamblers and the Tide are gone. Lose: the Shamblers take all your hp.
- Damage and splash keep the numbers down. Defence and health soak the bites. Efficiency shortens the dig. Every number is a starting value. They wait for a playtest. They are not final.
Each boss is the apex of an enemy family you have already met, so it tests the counter that family taught you — and because you meet a new subtype every third rung, its family is always familiar by the time its boss arrives.
Every boss is also a Leader, carrying all three auras at once. Anything fighting alongside it is faster, hits harder, takes less damage and shrugs off your afflictions far quicker than it should. That includes the boss itself, so a boss is tougher and hits harder than its own numbers suggest. Clearing the pack around a boss is not a distraction from the fight; it is the fight.
Bosses are also unmistakable on sight — at least twice the size of the enemy they are modelled on. Every boss also wears a bright gold outline and stands in a gold ring on the ground that slowly pulses. The ring stays on the ground when the boss jumps or is thrown, so it also shows where the boss will land. Outline and ring go away when the boss dies or leaves.
Riding the train
Zombies do not just bite the train — they hang on to it:
- Crawlers (the leapers) climb onto the roof or the walls of a carriage — never the engine — and once there is no room they pile on top of each other.
- Everyone else grabs a place on the ground beside a carriage and is dragged along. While the train moves, each dragged zombie becomes a handhold for one more, so long chains trail behind you. When the train stops, the chains let go and the crowd surrounds you instead.
- Draggers hook the train on a rope and fly behind it at speed — until they swing into a tree, a rock or a hillside, which snaps the rope and drops them stunned.
- Everything hanging on slows you down, and takes a little damage from being dragged. Take a sharp bend fast and riders get thrown off, landing stunned — the ones holding other zombies fly off most easily, and a whole chain goes with its first link.
Meeting the roster
You do not meet all twenty-six subtypes at once. Rung 1 carries only the Shambler and Bulwark — it already has enough to teach on its own. Starting on rung 2, one new subtype is introduced every third rung (2, 5, 8 and so on, up to rung 68): it is guaranteed to spawn near the track, and the game pauses and shows its stat sheet the first time it appears — its family, HP, speed, contact damage, physical/energy armour, and any control immunities it carries — rather than trying to point the camera at it (an enemy is sometimes behind something, or too small to make out at the moment it spawns). The Huskling arrives with the Husk, on rung 17. By rung 68 you will have met every subtype in the game, and none of them vanish again afterward. A boss's family is always met before the boss: the Burster comes on rung 14 (the Windlass is rung 20), the Bloater and Brooder on rungs 23 and 26 (the Brood-Mother is rung 30), and the Agro Leader on rung 59 (the Standard is rung 60). So the Leaders are not strictly the last three: the Agro Leader is early, and the Defense and Moral Leaders stay last.
| Rung | New subtype |
|---|---|
| 2 | Charger |
| 5 | Strider |
| 8 | Pouncer |
| 11 | Vaulter |
| 14 | Burster |
| 17 | Husk (and Huskling) |
| 20 | Ploughman |
| 23 | Bloater |
| 26 | Brooder |
| 29 | Bolter |
| 32 | Fire Spitter |
| 35 | Breaker |
| 38 | Dragger |
| 41 | Anchor |
| 44 | Ice Spitter |
| 47 | Toxic Spitter |
| 50 | Shieldbearer |
| 53 | Earth Spitter |
| 56 | Stalker |
| 59 | Agro Leader |
| 62 | Flinger |
| 65 | Defense Leader |
| 68 | Moral Leader |
New types start rare. A new type does not spawn at full weight on its first rung. Each special starts at 20% of its normal spawn weight on the rung it unlocks. It then grows (slowly at first, faster later) to full weight by rung 40. Types that unlock after rung 40 are at full weight at once. The Dragger is the exception: it starts at 2% on rung 38 and reaches full weight on rung 50. Boss adds and scripted set pieces do not change. The numbers are in towerdef.archetypeRarity in game.json.
Rung 1 also stages a small, unexplained pack — a Leader and a few escorts, wearing the violet glow described above. Nothing pauses for it and nothing names it; it is there so the glow means something the first time you see it, long before a Leader is formally introduced.